Saturday, November 30, 2013

Taking a break.......

 
I'll be taking a small break over the next couple of weeks. I want to wish everyone a happy and safe holiday. Check back with me in January, when I'll have some Pokemon to fill up this winter scene.


Friday, November 22, 2013

Shelgon

COMPLETED: 106  GOAL: 649?


Materials: gray, light purple and red yarn, yellow, black and white felt, polyfil, crochet hook 'F', craft glue


Body:
With gray, 6 sc in magic circle (6)
Row 1: 2 sc around (12)
Row 2: sc next, 2 sc next, around (18)
Row 3: sc next 2, 2 sc next, around (24)
Row 4: sc next 3, 2 sc next, around (30)
Row 5: sc next 4, 2 sc next, around (36)
Row 6: sc next 5, 2 sc next, around (42)
Row 7: sc next 6, 2 sc next, around (48)
Row 8: sc next 7, 2 sc next around (54)
Row 9: sc next 8, 2 sc next around (60)
Row 10: sc next 9, 2 sc next around (66)
Row 11: sc next 10, 2 sc next around (72)
Row 12: sc next 11, 2 sc next around (78)
Row 13 - 23: sc around (78)
Row 24: sc next 11, dec over next 2, around (72)
Row 25: sc next 10, dec over next 2, around (66)
Row 26: sc next 9, dec over next 2, around (60)
Row 27: sc next 8, dec over next 2, around (54)
Row 28: sc next 7, dec over next 2, around (48)
Begin stuffing.
Row 29: sc next 6, dec over next 2, around (42)
Row 30: sc next 5, dec over next 2, around (36)
Row 31: sc next 4, dec over next 2, around (30)
Row 32: sc next 3, dec over next 2, around (24)
Row 33: sc next 2, dec over next 2, around (18)
Row 34: sc next, dec over next 2, around (12)
Row 35: dec over next 2, around (6)
FO  Weave tail between loops and pull closed


Shell: (make 6)
With light purple, ch 7
Row 1: sc 2nd ch from hook, sc next 5, ch1, turn (6)
Row 2: 2 sc next, sc next 5,ch1, turn (7)
Row 3: 2 sc next, sc next 6, ch1, turn (8)
Row 4: 2 sc next, sc next 7, ch1, turn (9)
Row 5: 2 sc next. sc next 8, ch1, turn (10)
Row 6: 2 sc next, sc next 9, ch1, turn (11)
Row 7 - 22: sc across, ch1, turn (11)
Row 23: dec over next 2, sc next 9, ch1, turn (10)
Row 24: dec over next 2, sc next 8, ch1, turn (9)
Row 25: dec over next 2, sc next 7, ch1, turn (8)
Row 26: dec over next 2, sc next 6, ch1, turn (7)
Row 27: dec over next 2, sc next 5, ch1, turn (6)
FO

Sew all pieces together, leaving one seam open. Place shell over body and sew last seam close.


Ridges: (make three)
With light purple, ch 19
Row 1: 2 sc 2nd ch from hook, sc next 17, in back loops. 2 sc next, sc next 17 (38)
Row 2: sl st next 3, sc next 4, hdc next 5, sc next 4, sl st next 3, around (38)
Row 3: repeat row 2 (38)
FO

Sew one ridge to top of shell. Stuff as you go. Sew the other two ridges to the right and left pieces of shell. Stuff as you go. See picture.


Leg: (make 4)
With grey, 6 sc in magic circle (6)
Row 1: 2 sc around (12)
Row 2: sc next 3, 2 sc next around (15)
Row 3: 2 sc next 2, sc next 13 (17)
Row 4: sc next 2, 2 sc next 2, sc next 5*dec over next 2* twice, sc next 4 (17)
Row 5: repeat row 4 (17)\
FO


Inside Leg: (make 4)
With red, ch 4
Row 1: sc 2nd ch from hook, sc next 2,ch1, turn  (3)
Row 2: sc across, ch1, turn (3)
Row 3: dec over next 2, sc next (2)
FO

Sew inside leg to leg along flat side. Stuff legs and sew to shell.


Finish: Sew back of shell to body. Cut two eyes out of yellow felt in half circle shape. Cut two small ovals out of black felt for pupils. Cut two small circles out of white felt for highlights. Glue pieces to body. Hal of eye is hidden behind the shell. See picture. Sew front of shell to body. Sew along each of the seams of shell to give rounded effect.


Shelgon and Pokemon © Nintendo

This is my own original pattern. Please do not sell this pattern or the products created from this pattern. Please do not modify my pattern and call it your own. If you would like to place my pattern on another site, please feel free to provide a link.


Friday, November 15, 2013

Sentret

COMPLETED: 105  GOAL: 649?


Materials: dark brown, medium brown, off-white, pink and black yarn, polyfil. crochet hook 'F'


Body:
With medium brown, 6 sc in magic circle (6)
Row 1: 2 sc around (12)
Row 2: sc next, 2 sc next, around (18)
Row 3: sc next 2, 2 sc next, around (24)
Row 4: sc next 3, 2 sc next, around (30)
Row 5: sc next 4, 2 sc next, around (36)
Row 6: sc next 5, 2 sc next, around (42)
Row 7: sc next 6, 2 sc next, around (48)
Row 8: sc next 7, 2 sc next around (54)
Row 9 - 18: sc around (54)
Row 19: sc next 7, dec over next 2, around (48)
Begin stuffing.
Row 20: sc next 6, dec over next 2, around (42)
Row 21: sc next 5, dec over next 2, around (36)
Row 22: sc around (36)
Row 23: sc next 4, dec over next 2, around (30)
Row 24: sc around (30)
Row 25: sc next 3, dec over next 2, around (24)
Row 26: sc next 2, dec over next 2, around (18)
Row 27: sc next, dec over next 2, around (12)
Row 28: dec over next 2, around (6)
FO  Weave tail between loops and pull closed


Tail: (work in rows-you will change colors several times)
With medium brown, 6 sc in magic circle (6)
Row 1: 2 sc around (12)
Row 2: sc next, 2 sc next, around (18)
Row 3: sc next 2, 2 sc next, around (24)
Row 4: sc next 3, 2 sc next, around (30)
Change to dark brown.
Row 5: sc next 4, 2 sc next, around (36)
Row 6: sc next 5, 2 sc next, around (42)
Row 7: sc next 6, 2 sc next, around (48)
Change to medium brown.
Begin stuffing.
Row 8: sc next 6, dec over next 2, around (42)
Row 9: sc around (42)
Row 10: sc next 12, dec over next 2, around (39)
Row 11: sc around (39)
Row 12: sc next 11, dec over next 2, around (36)
Change to dark brown.
Row 13: sc around (36)
Row 14: sc next 10, dec over next 2, around (33)
Row 15: sc around (33)
Row 16: sc next 9, dec over next 2, around (30)
Change to medium brown.
Row 17: sc around (30)
Row 18: sc next 8, dec over next 2, around (27)
Row 19: sc around (27)
Row 20: sc next 7, dec over next 2, around (24)
Row 21: sc around (24)
Change to dark brown.
Row 22: sc next 6, dec over next 2, around (21)
Row 23: sc around (21)
Row 24: sc next 5, dec over next 2, around (18)
Row 25: sc around (18)
Row 26: sc next 4, dec over next 2, around (15)
Row 27: sc next 3, dec over next 2, around (12)
FO

Finish stuffing and sew to body.


Feet: (make 2)
With medium brown, ch 10
Row 1: 2 sc 2nd ch from hook, sc next 8, in back loops, 2 sc next, sc next 7, 2 sc next (21)
Row 2: sc around (21)
Row 3: sc next 6, *dec over next 2* five times, sc next 5 (16)
Row 4: sc next 4, *dec over next 2* four times, sc next 4 (12)
FO

Stuff lightly and sew to body.


Ears: (make 2)
With dark brown, 6 sc in magic circle (6)
Row 1: sc next, 2 sc next, around (9)
Row 2: sc around (9)
Row 3: sc next 2, 2 sc next, round (12)
Row 4: sc next 2, dec over next 2, around (9)
Row 5: sc around (9)
Row 6: sc next 3, dec over next 2, sc next 2, dec over next 2 (7)
Row 7: sc around (7)
Row 8: sc next 2, dec over next 2, sc next, dec over next 2 (5)
Row 9: sc around (5)
FO


Inside Ear: (make 2)
With pink, ch 7
Row 1: sc 2nd ch from hook, 2 sc next, sc next 4, ch 2, in back loops, sc next 4, 2 sc next, sc next (14)
FO


Sew inside ears to ears. Stuff the ears and sew to body.


Arms: (make 2)
With medium brown, 6 sc in magic circle (6)
Row 1: 2 sc around (12)
Row 2: sc next, 2 sc next, around (18)
Row 3: sc around (18)
Row 4: sc next 4, dec over next 2, around (15)
Row 5-6: sc around (15)
Row 7: sc next 8, sl st next 7 (15)
Row 8: sc next 8 (8)
FO

Stuff lightly and sew end closed. Sew to body. The arms should angle slightly downward.


Oval:
With off-white, ch 18, join
Row 1: sc around (18)
Row 2: sc next 4, 2 sc next, sc next, 2 sc next, sc next, 2 sc next, sc next 3, 2 sc next, sc next, 2 sc next, sc next, 2 sc next, sc next (24)
Row 3: sc next 7, 2 sc next, sc next, 2 sc next, sc next, 2 sc next, sc next 6, 2 sc next, sc next, 2 sc next, sc next, 2 sc next, sc next (30)
FO

Sew to front of body.


Finish: With black yarn, embroider a small mouth and two eyes. Embroider two lines on the front of each foot. Embroider a half circle on the inside of each arm. See picture.


Sentret and Pokemon © Nintendo
 

This is my own original pattern. Please do not sell this pattern or the products created from this pattern. Please do not modify my pattern and call it your own. If you would like to place my pattern on another site, please feel free to provide a link.


Friday, November 8, 2013

Blissey

COMPLETED: 105 GOAL: 649?


Materials: medium pink, white and black yarn, pink, white and black felt, polyfil, crochet hook 'F', craft glue, black permanent marker


Body:
With white, 6 sc in magic circle (6)
Row 1: 2 sc around (12)
Row 2: sc next, 2 sc next, around (18)
Row 3: sc next 2, 2 sc next, around (24)
Row 4: sc next 3, 2 sc next, around (30)
Row 5: sc next 4, 2 sc next, around (36)
Row 6: sc next 5, 2 sc next, around (42)
Row 7: sc next 6, 2 sc next, around (48)
Row 8: sc next 7, 2 sc next around (54)
Row 9 - 11: sc around (54)
Row 12: Change to medium pink, around (54)
Row 13 - 16: sc around (54)
Row 17: sc next 7, dec over next 2, around (48)
Begin stuffing.
Row 18: sc next 6, dec over next 2, around (42)
Row 19: sc next 5, dec over next 2, around (36)
Row 20: sc around (36)
Row 21: sc next 4, dec over next 2, around (30)
Row 22: sc around (30)
Row 23: sc next 3, dec over next 2, around (24)
Row 24 - 25: sc around (24)
Row 26: sc next 2, dec over next 2, around (18)
Row 27: sc around (18)
Row 28: sc next, dec over next 2, around (12)
FO  Weave tail between loops and pull closed.


Feet: (make 2)
With medium pink, ch 7
Row 1: 2 sc 2nd ch from hook, sc next 5, 2 sc next, sc next 5 (14)
Row 2: 2 sc next 2, sc next 4, 2 sc next 3, sc next 4, 2 sc next (20)
Row 3: sc next 4, 2 sc next, around (24)
Row 4: sc next 10, dec over next 2, around (22)
Row 5: *dec over next 2*, 4 times, sc next 4, *dec over next 2* twice, sc next 4, dec over next 2 (15)
Row 6: *dec over next 2* twice, sc next 9, dec over next 2 (12)
FO  Lightly stuff and sew bottom of body, toes slightly pointed outward. See picture.


Egg:
With white, 6 sc in magic circle (6)
Row 1: sc next, 2 sc next, around (9)
Row 2: sc next 2, 2 sc next, around (12)
Row 3: sc around (12)
Row 4: sc next 3, 2 sc next, around (15)
Row 5: sc next 4, 2 sc next, around (18)
Row 6 - 7: sc around (18)
Row 8: sc next 3, dec over next2, *sc next 2, dec over next 2* twice, sc next 3, dec over next 2 (14)
Row 9: sc next 2, dec over next 2, *sc next, dec over next 2* twice, sc next 2, dec over next 2 (10)
Row 10: sc next 5, dec over next 2, around (8)
FO 


Sew to body, half way between pink and white. Stuff lightly as you go.


Pouch:
With medium pink, ch 13.
Row 1: sc 2nd ch from hook, sc next 11, ch 1, turn (12)
Row 2: sc across, ch 1, turn (12)
Row 3: sc next 4, dec over next 2, ch 1, turn (10)
Row 4: sc next 3, dec over next 2, ch 1, turn (8)
Row 5: dec over next 2, around (4)
Row 6: dec over next 2, around (2)
FO Position pouch over lower half of egg and so on.


Arms: (make 2)
With medium pink, 3 sc in magic circle (3)
Row 1: sc next, 2 sc next, sc next, ch 1, turn (4)
Row 2: sc next 2, 2 sc next, around, ch 1, turn (6)
Row 3: change to white, sc next 3 (place marker in last sc), ch 3, turn (3)
Row 4: join at 1st sc in row 3 with sl st, sc in same s and next 2, sc in next 3 chs,(6)
Row 5: sc next 2, dec over next 2, sc next 2 (5)
Row 6: sc next, dec over next 2, sc next 2 (4)
Row 7: sc next, dec over next 2, sc next (3)
Row 8: dec over next 3 (1)
FO

Row 3: with white, join at marker with sl st, sc in same st and next 2 (place marker in last sc), ch 2, turn (3)
Row 4: join at 1st sc in row 3, sc in same st and next 2, sc in next 2 chs (5)
Row 5: sc next, dec over next 2, sc next 2 (4)
Row 6: sc next, dec over next 2, sc next (3)
Row 7: dec over next 3 (1)
FO

Row 3: with white, join at marker with sl st, sc in same st and next, ch 2, turn (2)
Row 4: join at 1st sc in row 3, sc in same st and next, sc in next 2 chs (4)
Row 5: sc next, dec over next 2, sc next (3)
Row 6: dec over next 3 (1)
FO


Position arms on body about even with top of egg. Point the arms upward at an angle. See picture. When you sew arms on, don't flatten, but rather shape them in a half cone shape.
FO


Skirt: (make 4 each size)

Large:
With white, 6 sc in magic circle (6)
Row 1-4: sc around (6)
Row 5: sc next, dec over next 2, around (4)
FO


Small:
With white, 6 sc in magic circle (6)
Row 1-3: sc around (6)
Row 4: sc next, dec over next 2, around (4)
FO


Stuff each piece. Each side of body is made of two small and two large pieces. Sew them together in a line (small, large, large, small). Then sew to body along first row of white. Center around each side.


Hair: (each piece will be made up of a center and two swirls)

Center: (make 2)
With medium pink, 3 sc in magic circle (3)
Row 1: 2 sc across, ch 1, turn (6)
Row 2: sc next, 2 sc next, across, ch 1, turn (9)
Row 3-5: sc across, ch 1, turn (9)
Row 6: sc next, dec over next 2, across, ch 1, turn (6)
Row 7: dec over next 2, across, ch 1, turn (3)
Row 8: dec across (1)


Swirl: (make 4)
With medium pink, 6 sc in magic circle (6)
Row 1-4: sc around (6)
Row 5-6: dec over next 2, sc next, 2 sc next, sc next (6)
Row 7: sc next 2, dec over next 2, sc next 2 (5)
Row 8: sc next 2, dec over next 2, sc next (4)
Row 9: sc next, dec over next 2, sc next (3)
Row 10: sc next, dec over next 2 (2)
Row 11: dec over next 2 (1)
FO


Form the swirl and secure. See picture for shape and position. Sew one swirl to each side of center. Then sew the assembly to the body.

Turn tip to form swirl and secure. Sew hair to ball and then sew to body.


Finish: Cut two very small ovals out of white felt for eyes. Either cut two smaller ovals out of black felt for pupils or use the marker to draw on the pupils. Glue eyes to body. Embroider the mouth  on face with black yarn. Cut mouth out of pink felt and glue on.


Blissey and Pokemon © Nintendo
 

This is my own original pattern. Please do not sell this pattern or the products created from this pattern. Please do not modify my pattern and call it your own. If you would like to place my pattern on another site, please feel free to provide a link.


Sunday, November 3, 2013

Manaphy

COMPLETED: 104 GOAL: 649?


Materials: blue and black yarn, yellow, white, black, pink and green-blue felt, polyfil, crochet hook 'F', craft glue, pipe cleaners


Body/Head:
With blue, 6 sc in magic circle (6)
Row 1: 2 sc around (12)
Row 2: sc next, 2 sc next, around (18)
Row 3: sc next 2, 2 sc next, around (24)
Row 4: sc next 3, 2 sc next, around (30)
Row 5: sc around (30)
Row 6: sc next 4, 2 sc next, around (36)
Begin stuffing.
Row 7 - 9: sc around (36)
Row 10: sc next 5, 2 sc next, around (42)
Row 11 - 12: sc around (42)
Row 13: *sc next 3, dec over next 2, sc next 2, dec next 2* 8 times, sc next 3 dec next 2 (32)
Row 14: * sc next 2, dec over next 2* 8 times (24)
Row 15: sc next 2, dec over next 2, around (18)
Row 16: sc next, dec over next 2, around (12)
Row 17: sc next 3, 2 sc next, around (15)
Row 18: sc next 2, 2 sc next, around (20)
Row 19: sc next 4, 2 sc next, around (24)
Row 20 - 21: sc around (24)
Row 22: sc next 5, 2 sc next, around (28)
Row 23 - 24: sc around (28)
Begin leg one.
Row 25: sc next 14, (place marker in last sc), skip next 14 sc, join with sl st (14)
Row 26: sc in same stitch as sl st, sc next 4, dec next 2, sc next 5, dec next 2 (12)
Row 27 - 28: sc around (12)
Row 29: sc next 3, 2 sc next, around (15)
Row 30: sc around (15)
Row 31: dec over next 2, around, sc last stitch (18)
FO  Weave tail between loops and pull close.

Begin leg two.
Row 25: join a marker with sl st, sc in same stitch, sc next 13 (14)
Row 26: sc next 5, dec over next 2, around (12)
Row 27 - 28: sc around (12)
Row 29- 30: sc next 3, 2 sc next, around (15)
Row 31: dec over next 2, around, sc in last s (8)
FO  Stuff before closing. Weave tail between loops and pull close.


Arms: (make 2)
With blue, 6 sc in magic circle (6)
Row 1- 4: sc around (6)
Row 5: sc next 2, 2 sc next, around (8)
Row 6: sc around (8)
Row 7: sc next 4, 2 sc next, around (10)
Row 8: sc around (10)
Row 9: 2 sc next 2, sc next 8 (12)
Row 10: sc next, 2 sc next 2, sc next 9 (14)
Row 11: sc around (14)
Row 12: sc next 3, *dec over next 2*, twice, sc next 7 (12)
Row 13: sc next 2, *dec over next 2*, twice, sc next 6 (10)
Row 14: sc around (10)
Row 15: sc next 2, * dec over next 2*, twice, sc next 4 (8)
Row 16: sc next, *dec over next 2*, twice, sc next 3 (6)
Row 17: sc next, *dec over next 2* twice, sc next 3 (5)
FO  Push a small amount of stuffing to the base of arm. The top part remains flat. Weave tail between loops and pull closed. Sew to body.


Antennae: (make 2)
With blue, 6 sc in magic circle (6)
Row 1: sc next 2, 2 sc next, around (9)
Row 2: sc around (9)
Row 3: sc next, dec next 2, around (6)
Stuff the ball.
Row 4: dec next 2, around (3)
Row 5 -7: sc around (3)
Row 8: sc next, 2 sc next, sc next (4)
Row 9: sc around (4)
Row 10: sc next 2, 2 sc next, sc next (5)
Row 11: sc around (5)
Row 12: sc next 2, 2 sc next, sc next 2 (6)
Row 13 - 14: sc around (6)
Row 15: sc next, dec next 2, sc next 3 (5)
Row 16: sc around (5)
Row 17: sc next, dec next 2, sc next 2 (4)
Row 18: sc around (4)
Row 19: sc next, dec next 2, sc next 2 (3)
Row 20 - 23: sc around (3)
FO  Fold pipe cleaner in half and insert in antennae. There will be some sticking out. Position antennae on top of head. Slide exposed pipe cleaner into head and sew antennae on.


Finish: The eyes are made from four layers of felt. Bottom layer is yellow felt, next is the blue green felt, then the black felt and the white felt is the highlight. See picture. Glue eyes to face. Cut four small circles out of yellow. Arrange over eyes and glue on. Embroider a line between each yellow circle and eye. See picture. The body has two oval buttons on it. Use the pink felt for the larger oval and yellow felt for the smaller. See picture. Final step is to cut the mouth out of pink felt and glue on.


Manaphy and Pokemon © Nintendo
 

This is my own original pattern. Please do not sell this pattern or the products created from this pattern. Please do not modify my pattern and call it your own. If you would like to place my pattern on another site, please feel free to provide a link.


Friday, October 25, 2013

Kirlia aka ???


Kirlia has decided to be one of her favorite monsters for Halloween. Which one? Check it out for yourself.. The pattern for Kirlia was posted back in August.


Materials: green, black, white and aqua yarn, white felt, crochet hook 'F', craft glue, polyfil


Body:
With green, 6 sc in magic circle (6)
Row 1: 2 sc around (12)
Row 2: sc next 2, 2 sc next, ch 2, skip next 2, sc, join with sc, 2 sc next, ch 2, skip next 2 sc, join with sc, 2 sc next, sc next 2, 2 sc next (14 + 4)
Row 3: sc next 2, 2 sc next, around (24)
Row 4: sc next 3, 2 sc next, around (30)
Row 5: sc next 4, 2 sc next, around (36)
Row 6: sc next 5, 2 sc next, around (42)
Row 7: sc next 6, 2 sc next, around (48)
Row 8: sc next 7, 2 sc next, around (54)
Row 9: sc around (54)
Row 10: sc next 14, ch 1, turn (14)
Row 11: skip 1st sc, sc next 45, dec over next 2, ch 1, turn (46)
Row 12: skip 1st sc, sc next 43, dec over next 2, ch 1, turn (44)
Row 13: skip 1st sc, sc next 5, ch 2, skip next 2 sc, join with sc, sc next 27, ch 2, skip next 2 sc, join with sc, sc next 3, dec over next 2, ch 1, turn (38 + 4)
Row 14: sc across, ch 1, turn (42)
Row 15: skip 1st sc, sc next 39, dec over next 2, ch 1, turn (40)
Row 16: skip 1st sc, sc next 37, dec over next 2, ch 16 (38 + 16)
Row 17: join to other side with sc, sc next 53 (54)
Row 18: sc next 19, ch 3, turn (19 + 3)
Row 19: sc 2nd ch from hook and across, ch 1 , turn (56)
Row 20: *sc next 7, dec over next 2* 6 times, sc next 2, ch 1, turn (50)
Row 21: sc next 2, *sc next 6, dec over next 2* 6 times, ch 1, turn (44)
Row 22: *sc next 5, dec over next 2* 6 times, sc next 2, ch 1, turn (38)
Row 23: sc across, ch 1, turn (38)
Row 24: *sc next 4, dec over next 2* 6 times, ch 1, turn (32)
Row 25: sc across, ch 1, turn (32)
Row 26: *sc next 3, dec over next 2* 6 times, sc next 2, ch 1, turn (26)
Row 27-28: sc across, ch 1, turn (26)
Row 29: *sc next 2, dec over next 2*  6 times, sc next 2, ch 1, turn (20)
Row 30: sc across (20)
Row 31: skip the first 2 sc on other side and join with sc, dec over next 2, *sc, dec over next 2* around (12)
Row 32: sc around (12)
FO


Mouth:
With black, ch 9
Row 1: sc 2nd ch from hook and across, ch 1, turn (8)
Row 2: 2 sc next, sc next 6, 2 sc next, ch 1, turn (10)
Row 3: sc next 2, 2 sc next, sc next, 2 sc next, sc next, 2 sc next, sc next 2, 2 sc next, ch 1, turn (14)
Row 4: 2 sc next, sc next 12, 2 sc next, ch 1, turn (16)
Row 5: 2 sc next, sc next 14, 2 sc next (18)
FO


Sew mouth to body.


Eye: (made with three pieces)

Piece #1
With white, 6 sc in magic circle (6)
Row 1: 2 sc around (12)
Row 2: sc next, 2 sc next, around (18)
Row 3: sc next 2, 2 sc next, around (24)
Row 4: sc next 3, 2 sc next, around (30)
FO

Piece #2
With aqua, 6 sc in magic circle (6)
Row 1: 2 sc around (12)
FO

Piece #3
With black, 6 sc in magic circle (6)
FO

Layer the pieces together and secure. The pupil is set off center. See picture. Sew to body.


Eye Lid:
With green, ch 31
Row 1: sc 2nd ch from hook, sc next 4, ch 1, turn (15)
Row 2: sc next 3, hdc next 8, sc next 4, ch 1, turn (15)
Row 3: sc next, *sc next 2, dec over next 2* 3 times, sc next 2 (12)
FO

Position eye lid around the eye. The largest part of the lid in off center. Look at picture for placement. Sew lid on, connecting end.


Teeth:

Top:
With white, ch 17
Row 1: starting in 2nd ch from hook, *sl st next, sc and dc in next st* 8 times (24)
FO


Bottom:
With white, ch 11
Row 1: starting in 2nd ch from hook, *sl st next, sc and dc in next st* 5 times (15)
FO

Position teeth at the edge of the mouth. The top set of teeth should extend just past the mouth. The bottom set of teeth will only fill the bottom portion of the mouth, Secure the teeth by whip stitching between each tooth.


Outside Mouth:
With green, ch 51
Row 1: sl st next 24, sc next 26, ch 1, turn (50)
Row 2: sl st next 4, sc next 18, sl st next 4, ch 1, turn (26)
FO

Position around mouth along edge of teeth. Row 2 should be evenly spaced at the bottom of the mouth. Sew around rolling row 2 forming a bottom lip.


Horns: (make 2)
With white, 6 sc in magic circle (6)
Row 1: sc next, 2 sc next, around (9)
Row 2: sc around (9)
Row 3: sc next, dec over next 2, around (6)
Row 4: s next, dec over next 2, around (4)
Row 5: dec over next 2, around (2)
FO

Sew horns to top of head.

Place Kirlia inside of Mike and pull arms and legs through holes. Stuff as needed to fill out the body. Sew closed the opening on back.


Gloves:
With green, ch 6, join
Row 1-2: sc around (6)
Row 3: sc next, 2 sc next, around (9)
Row 4: sc around (9)
Row 5: ch 3, sc 2nd ch from hook and next (thumb), sc in row 4, dec over next 2, sc next, dec over next 2, sc next, dec over next 2 (8)
Row 6: sc around (go past the ch for the thumb) (8)
Row 7: (fingers) flatten, sc in first (pick up both loops), ch 3, sc 2nd ch from hook and next, sl st in base of ch, sc in next sc of row 6 (pick up both loops), ch 4, sc 2nd ch from hook and next 2, sl st in base of ch, sc in next sc in row 6 (pick up both loops), ch 3, sc 2nd ch from hook and next, sl st in base of ch
FO  Leave long tail.


Using tail, whip stitch the edges of the first finger together creating a long thin finger. Repeat for each of the fingers and the thumb. Cut 4 tiny triangles for each hand for the claws. Glue to end of fingers/thumb. Let dry and then sew gloves to Kirlia's arms.


Feet: (make 2)
With green, ch 7
Row 1: 2 sc 2nd ch from hook, sc next 3, 2 sc next, 3 sc next, in back loops, 3 sc next, 2 sc next, sc next 3, 2 sc next (20)
Row 2: *sc next, dec over next 2* 6 times, sc next 2 (14)
Row 3: *sc next, dec over next 2* 4 times, sc next 2 (10)
Row 4: *sc next, dec over next 2* 3 times, sc next (7)
Row 5: sc around (7)
FO

Toes: (make 2)
With green, ch 3
Row 1: sc 1st ch, ch 2, sc 2nd ch from hook, sl st in next ch, ch 2, sc 2nd ch from hook, sl st in next ch, ch 2, sc 2nd ch from hook, sl st in base of ch
FO

Sew toes to end of feet. Cut 3 tiny triangles out of white felt for each toe. Glue to toes. Let dry and then position feet on Kirlia's legs and secure.


Mike Wazowski © Disney/Pixar


This is my own original pattern. Please do not sell this pattern or the products created from this pattern. Please do not modify my pattern and call it your own. If you would like to place my pattern on another site, please feel free to provide a link.


Wednesday, October 16, 2013

Crustle


COMPLETED: 103  GOAL: 649?


I made a small miss calculation when making Crustle. I finished the body first and then the rock. The rock turned out to big for the body. So what I did was make a second  larger body to fit the rock. I then used my original body for the costume. I've incorporated both sizes in the pattern. The instructions in italic refer to the larger version. Replace or add rows accordingly.


Don't forget to scroll down and see who Crustle is for Halloween.

"Mama! There's a girrrrrrl in the castle."


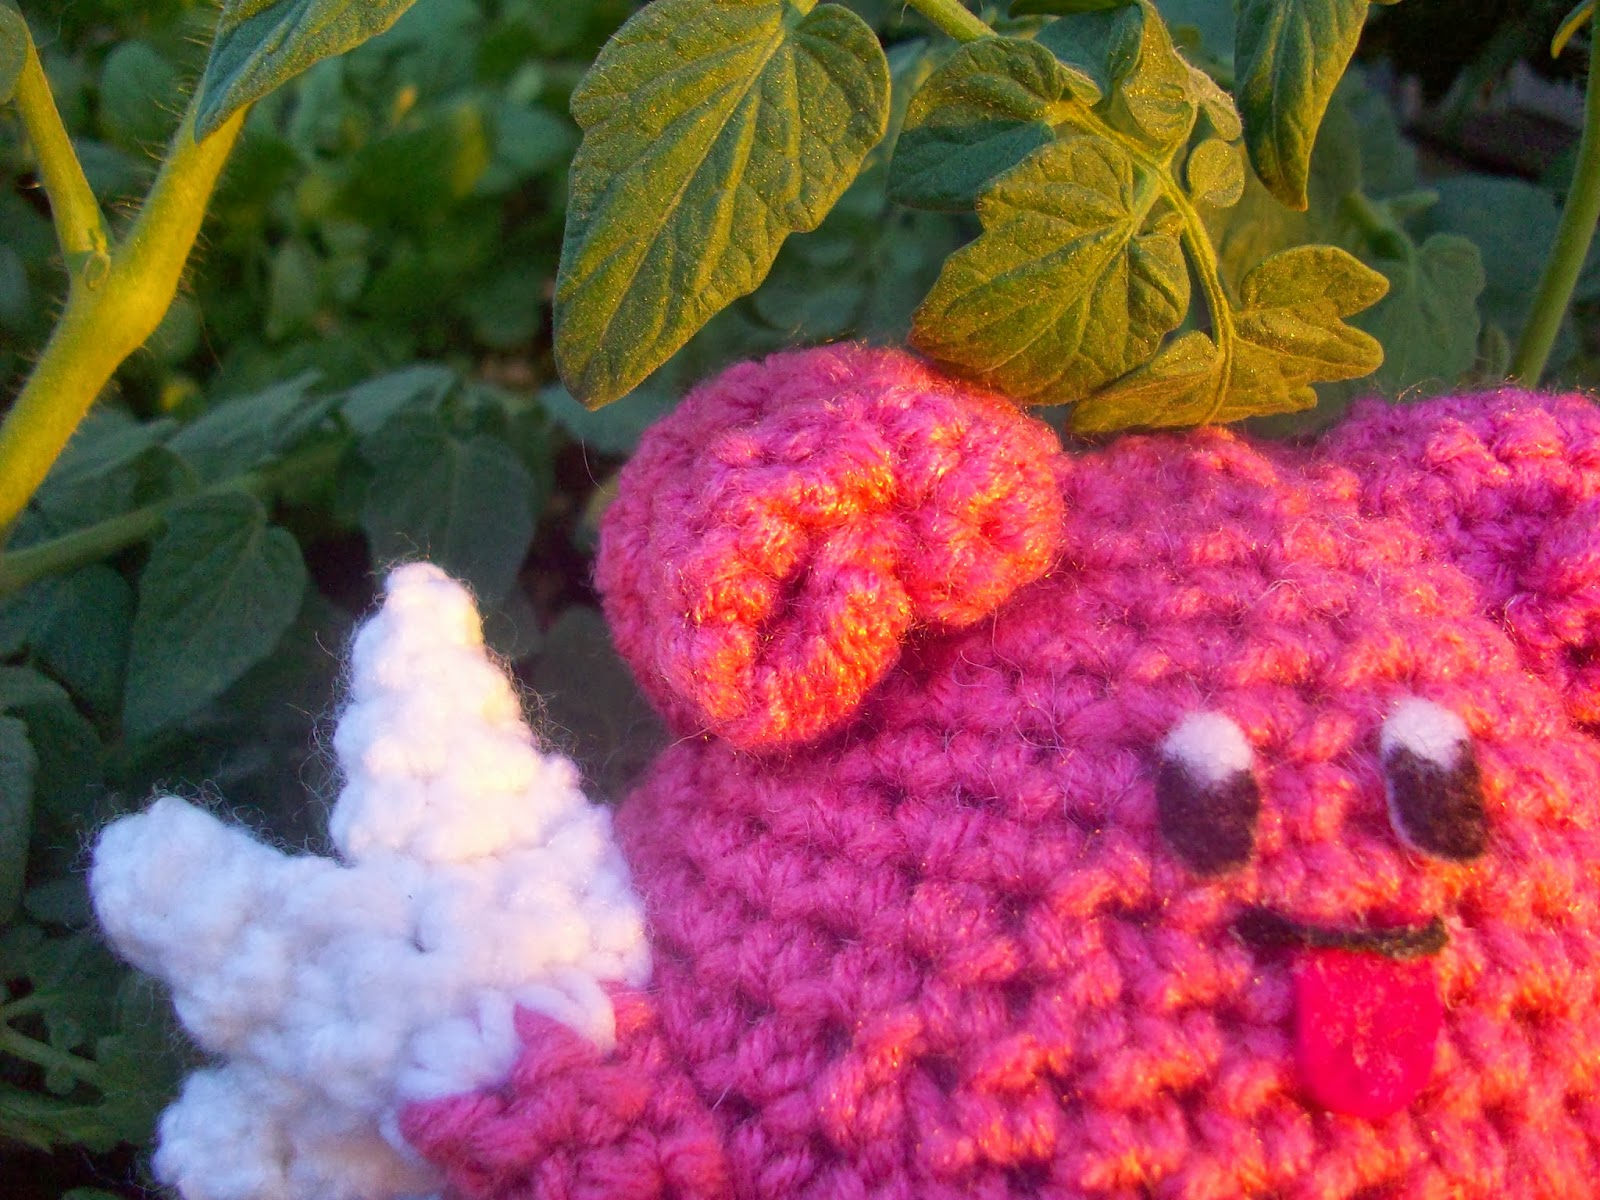
Materials: deep red (burgundy), dark gray yarn, yellow and black felt, polyfil, crochet hook 'F', craft glue


Body:
With a red, 6 sc in magic circle (6)
Row 1: 2 sc around (12)
Row 2: sc next, 2 sc next, around (18)
Row 3: sc next 2, 2 sc next, around (24)
Row 4: sc around (24)
Add: row, sc next 3, 2 sc next, around (30)
Add: row, sc next 4, 2 sc next, around (36)
Add: row, sc next 4, dec over next 2, around (30)
Add: row, sc next 3, dec over next 2, around (24)
Row 5: sc next 6, dec over next 2, around (21)
Row 6-7: sc around (21)
Row 8: sc next 5, dec over next 2, around (18)
Row 9-11: sc around (18)
Begin stuffing.
Row 12: sc next 4, dec over next 2, around (15)
Row 13: sc around (15)
Row 14: sc next 3, dec over next 2, around (12)
Row 15: sc around (15)
Row 16: sc next 2, dec over next 2, around (9)
Row 17: sc around (9)
Row 18: sc next, dec over next 2, around (6)
Weave tail between loops and pulled closed.


Claws: (the claws will be made in three pieces, make 2)

Piece #1-main body (make 2)
With red, 4 sc in magic circle (4)
Replace: with red, 6 sc in magic circle (6)
Row 1: sc next, 2 sc next, around (6)
Row 2: sc next 2, 2 sc next, around (9)
Row 3-4: sc around (9)
Row 5: sc next 2, 2 sc next, around (12)
Row 6: change to gray, sc around (12)
Add:  row, sc next 3, 2 sc next, around (15)
Add: row, sc next 3, dec over next 2, around (12)
Begin stuffing.
Row 7: sc next 2, dec over next 2, around (9)
Row 8: sc next, dec over next 2, around (6)
Row 9: sc next (place marker), ch 2, skip next 3 sc and join with sl st, sc in same st, sc next (3 + 2 ch)
Row 10: sc around (5)
Row 11: sc next, *dec over next 2* twice (3)
Weave tail between loops and pull closed.

Row 9: join at marker with sl st, sc next 3, sc next 2 (was chain from row 9 above) (5)
Row 10: sc around (5)
Row 11: sc next, *dec over next 2* twice (3)
Weave tail between loops and pull closed.

Piece #2-outer claw (make 2)
With gray, ch 12, join
Row 1-3: sc around (12)
FO

Slide piece #2 on piece #1. Match the edge of piece #2 to row 5 of piece #1 and sew together. The open end of piece 2 should be towards the end of the claw. Place a small amount of stuffing under piece #2 and sew to piece #1 at row 7.

Piece #3-arm (make 2)
With red, ch 4
Replace: with red, 5 sc in magic circle (5)
Row 1: sc 2nd ch from hook and next 2, ch 1, turn (3)
Replace: sc around (5)
Row 2: sc across, ch 1, turn (3)
Replace: sc around (5)
Row 3: sc across (3)
Replace: sc around (5)
Add: row 4-5, sc around (5)
FO

Put a small piece of pipe cleaner inside of piece and sew closed. Sew one end to the claw and the other to the body to the side of what will be his face..


Tail:
With red, 4 sc in magic circle (4)
Replace: with red, 6 sc in magic circle (6)
Row 1-4: sc around (4)
Replace: sc around (6)
Row 5: change to gray, sc around (4)
Replace: change to gray, sc around (6)
Row 6: sc next, dec over next 2, sc next (3)
Replace: sc next 2, dec over next 2, sc next 2 (5)
Row 7: sc next, dec over next 2 (2)
Replace: sc next 2, dec over next 2, sc next (4)
Add: row 8, sc next, dec over next 2, sc next (3)
FO

Sew to body.


Legs: (make 6)
With red, 3 sc in magic circle (3)
Replace: with red, 4 sc in magic circle (4)
Row 1-3: sc around (3)
Replace: sc around (6)
Row 4: 2 sc next, sc next, 2 sc next (5)
Replace: sc around (6)
Row 5: change to gray, sc next, dec over next 2, sc next 2 (4)
Replace: sc around (6)
Row 6: dec over next 2, sc next 2 (3)
Replace: sc around (6)
Row 7: dec over next 2, sc next (2)
Replace: sc around (6)
Add: row 8-10, sc around (6)
Add: row 11, sc next 2, dec over next 2, sc next 2 (5)
Add: row 12-15, sc around (5)
Add: row 16, change to gray, sc around (5)
Add: row 17, sc around (5)
Add: row 18, sc next, dec over next 2, sc next 2 (4)
Add: row 19, sc next, dec over next 2, sc next (3)
Add: row 20, sc next, dec over next 2 (2)
FO

Sew to body.


Eyes: (make 2)
With red, ch 4
Replace: with red, ch 5
Row 1: sc 2nd ch from hook and next 2, in back loops, 2 sc next, sc next 2 (6)
Replace: 2 sc next, sc next 3, 2 sc next, sc next 3 (10)
Row 2: sc around (6)
Replace: sc around (10)
Row 3: sc next, dec over next 2, around (4)
Replace: sc next 3, dec over next 2, around (8)
Row 4: sc around (4)
Replace: sc around (8)
Row 5: sc next, dec over next 2, sc next (3)
Replace: sc next 2, dec over next 2, around (6)
Add: row 6, sc next, dec over next 2, around (4)
Add: row 7, dec over next 2, sc next (3)
FO

Add a little stuffing and sew to body. Flatten row 1 and cut out two ovals from yellow felt that will fit on the flat surface. Cut two smaller ovals out of black felt for pupils. Glue to eyes.


Crustle's Rock


Materials: brown, dark brown, cornflower yellow, polyfil, crochet hook 'F' cardboard (if you want to stiffen the sides)


Right side
 

Right Side: (work in rows-ch 1 and turn at end of each row)
With brown, ch 19
Row 1: sc next 12, hdc next 6 (18)
Row 2: change to dark brown, hdc next 4, sl st next 2, sc next 2, sl st next 2, sc next 3, sl st next 2, sc next 3 (18)
Row 3: 2 sc next, sc next 2, ch 2, skip 2 sc, sc next 3, ch 2, skip 2 sc, sc next 2, ch 2, skip 2 sc, sc next 4 (13 + 6)
Row 4: hdc next 6, sc next 4, hdc next 3, sc next 6 (19)
Row 5: sc next 6, hdc next 3, sc next 4, hdc next 6 (19)
Row 6: hdc next 6, sc next 4, hdc next 3, sc next 6 (19)
Row 7: sc next 3, change to brown, sc next 16 (19)
Row 8: sc across (19)
Row 9: sc next 18, 2 sc next (20)
Row 10-14: sc across (20)
Row 15: change to yellow, hdc next 2, sc next 3, sl st next 3, sc next 8, hdc next 4 (20)
Row 16: hdc next 4, sc next 8, sl st next 3, sc next 3, hdc next 2 (20)
Row 17: sc next 3, change to brown, sc next 17 (20)
Row 18: sc next 19, 2 sc next (21)
Row 19: sc across (21)
Row 20: change to dark brown, sc next, hdc next, dc next 3, hdc next 3, sc next 2, sl st next 11 (21)
Row 21: change to brown, sc across (21)
Row 22: sc across (21)
Row 23: sc next 15, hdc next 2, dc next 3, hdc next (21)
FO


Yellow Spot:
Embroider with yellow yarn. See picture for placement. 


Brown Spot:
With brown, ch 4
Row 1: sc 2nd ch from hook & next, 2 sc next, ch 1, turn (4)
Row 2: dc next 2, hdc next, sc next, ch 1, turn (4)
Row 3: sc next 2, sl st next (3)
FO 

Sew to right side, See picture for placement.
 

Back


Back: (work in rows-ch 1 and turn at end of each row)
With brown, ch 19
Row 1: sc 2nd ch from hook, sc next 17 (18)
Row 2: sc across (18)
Row 3: sl st next 4, sc next 2, hdc next 3, sc next 5, sl st next 2, sc next 2 (18)
Row 4: change to dark brown, sc next, 2 sc next, sc next, sl st next 2, sc next 5, hdc next 3, sc next 2, sl st next 4 (19)
Row 5: hdc next 5, sc next 3, sl st next 2, hdc next 2, sc next 3, hdc next 3 (19)
Row 6: hdc next 3, sc next 3, hdc next 2, sl st next 2, sc next 3, hdc next 6 (19)
Row 7: change to brown, 2 hdc next, hdc next 5, sc next 3, sl st next 2, hdc next 2, sc next 3, hdc next 3 (20)
Row 8-9: sc across (20)
Row 10: hdc next 3, sc next 3, sl st next 3, hdc next 3, sc next 3, sc next 3, sl st next 3, sc next 2 (20)
Row 11: sc next 2, sl st next 3, sc next 3, hdc next 3, sl st next 3, sc next 3, hdc next 3 (20)
Row 12: change to yellow, hdc next 3, sc next 6, hdc next 3, sc next 8 (20)
Row 13: 2 sc next, sc next 14, hdc next 5 (21)
Row 14: hdc next 6, sl st next 6, sc next 9 (21)
Row 15: sl st next 15, hdc next 6 (21)
Row 16: change to brown, hdc next 6, sc next 15 (21)
Row 17-18: sc across (21)
Row 19: change to dark brown, sc next 15, hdc next 6 (21)
Row 20: change to brown, sc next 21 (21)
Row 21-22: sc across (21)
Row 23: hdc next 3, sl st next 5, sc next 5, hdc next 5, sc next 3 (21)
FO


Dark Brown Spot:
With brown, ch 5
Row 1: sc 2nd ch from hook, sc next 2, 2 sc next, ch 1, turn (5)
Row 2: 2 sc next, sc next 3, sl st next (5)
FO


Yellow Spot:
With yellow, ch 4
Row 1: 2 sc 2nd ch from hook, sc next 2, in back loops, 2 sc next, sc next 2 (8)
FO


Sew spots to back piece. See picture for placement.


Left side
 
 Left Side: (work in rows-ch 1 and turn at the end of each row)
With brown, ch 19
Row 1: sc 2nd ch from hook and next 17 (18)
Row 2: sc next 4, ch 2, skip next 2 sc, sc next 2, ch 2, skip next 2 sc, sc next 3, ch 2, skip next 2 sc, sc next 3 (12 + 6))
Row 3: sc next 6, sl st next, change to dark brown, sl st next, sc next 10 (18)
Row 4: 2 sc next, sc next 17 (19)
Row 5: sc across (19)
Row 6: sc next 12, sl st next (13)
Row 7: skip 1st st, ss next 12 (13)
Row 8: sc next 8, sl st next (9)
Row 9: skip 1st st, sc next 8 (8)
Row 10: sc across (19)
Row 11: 2 sc next, sc next 18 (20)
Row 12: sc next 15, hdc next 5 (20)
Row 13: hdc next 5, sc next 15 (20)
Row 14: hdc next 6, sc next 5, hdc next 5, dc next 4 (20)
Row 15: change to yellow, sc across (20)
Row 16: dc next 3, hdc next 4, sc next 6, hdc next 7 (20)
Row 17: hdc next 3, sc next 5, sl st next 5, sc next 4, hdc next 3 (20)
Row 18: change to brown, sc across (20)
Row 19: 2 sc next, sc next 19 (21)
Row 20: sc next 12, hdc next 6, dc next 3 (21)
Row 21: change to dark brown, dc next 3, hdc next 6, sc next 12 (21)
Row 22: change to brown, sc across (21)
Row 23: sl st next 10, sc next 4, hdc next 3, dc next 4 (21)
FO
 
 
Yellow spot:
Embroider with yellow yarn. See picture for placement.
 
 
Dark Brown Spot:
With dark brown, ch 6
Row 1: sc 2nd ch from hook and next 4, ch 1, turn (5)
Row 2: skip 1st st, sc next 2, dec over next 2, ch 1, turn (3)
Row 3: 2 sc next,  sc next, 2 sc next, ch 1, turn (5)
Row 4: sc across (5)
 
Sew spot to left side. See picture for placement.
 

Front
 
Front: (work in rows-ch 1 and turn at end of row, unless otherwise noted)
With brown, ch 19
Row 1: sc across (18)
Row 2: sl st next 6, sc next 12 (18)
Row 3: change to dark brown, sc next 5, (place marker), ch 2, turn (5 + 2)
Row 4: sc 2nd ch from hook and next 5 (6)
Row 5: sc across, ch 2, turn (6 +2)
Row 6: sc 2nd ch from hook and next 6 (7)
Row 7: sc across, ch 2, turn (7 + 2)
Row 8: sc 2nd ch from hook and next 7, (place 2nd marker) (8)
FO
 
Row 3: skip 7 sts from 1st marker, join with sl st, sc in same st and next 4 (5)
Row 4: sc across, ch 2, turn (5 + 2)
Row 5: sc 2nd ch from hook and next 5 (6)
Row 6: sc across, ch 2, turn (6)
Row 7: sc 2nd ch from hook and next 6 (7)
Row 8: sc across (7)
FO
 
Row 9: with brown, join at 2nd marker with sl st, sc in same st, sc next 7, ch 4, join at other side, sc next 7 (15 + 4)
Row 10: sc across (19)
Row 11: hdc next 5, sc next 9, hdc next 5 (19)
Row 12: hdc next 3, sc next 11, hdc next 5 (19)
Row 13: dc next 3, sc next 16 (19)
Row 14: change to yellow, sc next 9, dc next 3, sc next 8 (19)
Row 15: 2 sc next, sc across (20)
Row 16: hdc next 4, sc next 3, sl st next 5, dc next 3, hdc next 5 (20)
Row 17: change to brown, sc across (20)
Row 18: sc next 12, hdc next 8 (20)
Row 19: 2 hdc next, hdc next 4, sc next 8, sl st next, change to dark brown, sc next 5 (21)
Row 20: sl st next 7, dc next 3, sc next 3, dc next 3, hdc next 2, dc next 3 (21)
Row 21: change to brown, sc next 21 (21)
Row 22: sc next 8, hdc next 3, sc next 4, hdc next 2, dc next 4 (21)
Row 23: sc next 4, hdc next 4, sc next 13 (21)
FO


Small Yellow Spot:
Embroider with yellow yarn. See picture for placement.


Large Yellow Spot:
With yellow, ch 5
Row 1: sc 2nd ch from hook and across, ch 1, turn (4)
Row 2: skip 1st st, sc next, dec over next 2 (2)
FO

Sew spot to front. See picture for placement.

 
Top
 
 
Top: (work in rows-ch 1 and turn at end of each row)
With brown, ch 22
Row 1: sc 2nd ch from hook and next 20 (21)
Row 2-22: sc across (21)
FO
 
 
Bottom: (work in rows-ch 1 and turn at end of each row)
With dark brown, ch 19
Row 1: sc 2nd ch from hook and next 17 (18)
Row 2-19: sc across (18)
FO


Finish: First you will need to sew the two sides, the front and back together first. Place each piece together right side face to right side and sew. Work your way around the rock. Turn the piece so the right side is now out. Position bottom piece and begin to sew using sc. Make sure you catch both loops. When you are done. Place Crustle inside. His feet should stick out of the holes you created on the side pieces and his head should fit out the hole in the front piece. His tail is hidden. At this point you can add cardboard and/or begin to stuff the rock. To keep the stuffing in around his head, make a few quick sts between Crustle and his rock. Position the top and begin to sew using sc. Just like you did for the bottom. Continue to stuff as you go. To create the bumpy appearance for the top. I took a length of yarn, secured it at one end somewhere on the top piece and weaved it around randomly, pulling the yarn tighter when I wanted to form a peak and leaving it unpulled to create valleys.


Chip Costume:


Materials: white, yellow, medium pink, light pink, blue and black yarn, white, black and pink felt, crochet hook "F', craft glue, pipe cleaner, permanent marker

 
Base before adding top rim


Base: (the cup base is made up of four components: the main body, the rim on the bottom, the rim on the top and the leave-like shapes that go around the base)


Main body: (make 2)
With medium pink, 6 sc in magic circle (6)
Row 1: 2 sc around (12)
Row 2: sc next, 2 sc next, around (18)
Row 3: sc next 2, 2 sc next, around (24)
Row 4: sc next 2, 2 sc next, around (32)
Row 5-6:  sc around (32)
Row 7: sc next 7, 2 sc next, around, ch 1, turn (36)
Row 8: sc next 11 (place marker), ch 1, turn (11)
Row 9: sc cross, ch 1, turn (11)
Row 10: sc next, *sc next 2, 2 sc next* 3 times, sc next (14)
FO

Row 8: skip 8 sc from marker, join with sl st, sc in same st, sc next 10, ch 1, turn (11)
Row 9: sc across (11)
Row 10: sc next, *sc next 2, 2 sc next* 3 times, sc next (14)
FO


The large opening will be the front and will sit on Crustle just behind the eyes. The small opening will be for his back end.

  
Bottom Rim:
Row 1: With yellow, join at one end of  row 10 on base with sl st, sc in same st, sc next 10, ch 1, turn (11)
Row 2: sc across, ch 1, turn (11)
Row 3 sc across (11)
FO

Repeat row 1-3 on other side. Looking at your base, roll the yellow towards you. Secure the last row of  the rim to the row where you change from pink to yellow (row 10 of base, row 1 of rim).


Top Rim:
With yellow, 6 sc in magic circle (6)
Row 1: 2 sc around (12)
Row 2: sc next, 2 sc next, around (18)
Row 3: sc next 2, 2 sc next, around (24)
Row 4-5: sc around (24)
FO

Roll last three rows towards you and under. Secure row 5 to row 3. Put aside for now. You will be adding the leave decorations to the base and then sewing on the top rim.
 

Completed base
  

Leave decorations: (make 4 blue leaves, make 2 large pink leaves and 2 small pink leaves)

Blue Leaves:
With blue, ch 3
Row 1: sc 2nd ch from hook and next, ch 1, turn (2)
Row 2-4, sc across, ch 1, turn (2)
Row 5: dec over next 2 (1)


Large Pink Leaves:
With pink, ch 5
Row 1: sc 2nd ch from hook and next 3, ch 1, turn (4)
Row 2: sc across, ch 1, turn (4)
Row 3: sc next, dec over next 2, sc next, ch 1, turn (3)
Row 4: sc across, ch 1, turn (3)
Row 5: sc next, dec over next 2, ch 1, turn (2)
Row 6: sc across (2)
FO


Small Pink Leaves:
With pink, ch 5
Row 1: sc 2nd ch from hook and next 3, ch 1, turn (4)
Row 2: sc across, ch 1, turn (4)
Row 3: sc next, dec over next 2, sc next, ch 1, turn (3)
Row 4: sc across, ch 1, turn (3)


The leaves are alternated by color (blue, pink, blue, pink etc), but because there is an opening for the head and tail, you will need to put the two smaller pink leaves above these openings. Starting from the front and moving around to the right it should be: small pink, blue, large pink, blue, small pink, blue, large pink, blue. The top of the leaves should be attached at row 3 of base. When finished, take the top rim and secure it to the top of the base, just above the leaves. Take your second base piece and put it on the inside of your finished base piece and secure around. Your covering any stitches from when you sewed the leaves on and adding a little more support.


Outside Cup:
With white, 6 sc in magic circle (6)
 Row 1: 2 sc around (12)
Row 2: sc next, 2 sc next, around (18)
Row 3: sc next 2, 2 sc next, around (24)
Row 4: sc next 3, 2 sc next, around (30)
Row 5: sc next 4, 2 sc next, around (36)
Row 6-7: sc around (36)
Row 8: sc next 5, 2 sc next, around (42)
Row 9-10: sc around (42)
Row 11: sc next 9, 2 sc next, *sc next 10, 2 sc next* twice, sc next 9, 2 sc next (46)
Row 12-13: sc around (46)
Row 14: sc next 7, 2 sc next, *sc next 5, 2 sc next* five times, sc next 7, 2 sc next (53)
Row 15: sc around (53)
Row 16: sc around, ch 1, turn (53)
From this point, you will be working in rows, creating the chip in the cup.
Row 17: sc next 17, 2 sc next, sc next 16, 2 sc next, sc next 17, 2 sc next, ch 1, turn (56)
Row 18: skip 1st sc, sc next 10, 2 sc next, sc next 32, 2 sc next, sc next 10, sl st next, ch 1, turn (57)
Row 19: skip 1st sc, sl st next, sc next 54, sl st next, ch 2, turn (56 + 2)
Row 20: 2 sc 2nd ch from hook, skip next sc, sc next 54, sl st next (57)
FO


Inside Cup:
Repeat instructions for outside cup, except skip row 7 and row 10.


Put together both pieces of the cup matching up the chip. Sew the two pieces together along the top edge and inside of the chip.


Cup Rim:
With yellow:
Row 1: join at top edge of cup at one side of the chip with sl st, sc in same st, sc around, ch 1, turn (56)
Row 2: sc around, ch 1 ,turn (56)
Row 3: sc around (56)

Roll rows towards you and secure row 3 to row 1 of rim. Position cup on the base, remember the short pink leaves should be in the front and back. Secure the pieces together.


Handle:
With yellow, 6 sc in magic circle (6)
Row 1-3: sc around (6)
Row 4: sc next 2, dec over next 2, sc next 2 (5)
Row 5-6: sc around (5)
Row 7: sc next 2, dec over next 2, sc next (4)
Row 8-9: sc around (4)
Row 10: sc next, dec over next 2, sc next (3)
Row 11-16: sc around (3)
FO

Fold a pipe cleaner in half, secure the end together and slide into the handle. Sew the end closed. Bend the handle until you get the shape you want.


Finish: Cut two large ovals out of white felt for eyes. Two smaller oval out of black felt for pupils and two small circles out of white felt for highlights. Glue eye together and trim to correct shape. See picture. I used the marker to outline the eyes. Cut two eyebrows out of black felt. Cut the mouth out of pink felt. Position the pieces on the cup along with the handle. If all looks good, glue and sew on. Using black yarn, embroider the lines under the eyes and around mouth. Secure Crustle to the cup-I used a small piece of velcro.


Fill the cup up with candy and other treats to Crustle smiling.


Crustle and Pokemon © Nintendo
Chip © Disney


This is my own original pattern. Please do not sell this pattern or the products created from this pattern. Please do not modify my pattern and call it your own. If you would like to place my pattern on another site, please feel free to provide a link.


Friday, October 11, 2013

Smoochum

COMPLETED: 102  GOAL: 649?


Smoochum has decided to be one of her favorite TV characters for Halloween. Along with Map and Backpack she is ready to have fun. Scroll down and take a look...............


Smoochum Pattern


Materials: medium pink (I used a medium pink, but it should be a bright pink, Dora's shirt is also a bright pink so I wanted to make them different), light pink, light yellow, medium yellow, aqua (blue-green) and white felt, crochet hook (F), polyfil, craft glue


Head:
With pink, 6 sc in magic circle (6)
Row 1: 2 sc around (12)
Row 2: sc next, 2 sc next, around (18)
Row 3: sc next 2, 2 sc next, around (24)
Row 4: sc next 3, 2 sc next, around (30)
Row 5: sc next 4, 2 sc next, around (36)
Row 6: sc next 5, 2 sc next, around (42)
Row 7-12, sc around (42)
Row 13: sc next 5, dec, around (36)
Begin stuffing.
Row 14: sc next 4, dec, around (30)
Row 15: sc next 3, dec, around (24)
Row 16: sc next 2, dec, around (18)
Row 17: sc next, dec, around (12)
Row 18: dec around (6)
FO Weave tail between loops and pull  closed.


Body: (you will be changing colors, so you may want to finish each row rather then making them continuous)
With pink, 6 sc in magic circle (6)
Row 1: 2 sc around (12)
Row 2: sc next, 2 sc next, around (18)
Row 3: sc next 2, 2 sc next, around (24)
Row 4: sc next 3, 2 sc next, around (30)
Row 5: sc next 4, 2 sc next, around (36)
Row 6-9, sc around (36)
Change to light yellow
Row 10-12: sc around (36)
Begin stuffing.
Row 13: sc next 4, dec, around (30)
Row 14: sc next 3, dec, around (24)
Row 15: sc next 2, dec, around (18)
Row 16: sc next, dec, around (12)
Row 17: dec around (6)
Weave tail between loops and pull closed.

The yellow side of the body is up and the pink side is down. Sew head to body.


Arms: (make 2)
With light yellow, 4 sc in magic circle (4)
Row 1: sc next, 2 sc next, around (6)
Row 2: sc next, 2 sc next, around (9)
Row 3: sc next, 2 sc next, around, end with a sc (13)
Row 4: sc next 2, dec, *sc next, dec* three times (9)
Row 5: sc around (9)
Stuff lightly. The arms are a bit flat.
Row 6: *dec, sc next* three times (6)
Row 7: dec around (3)
Row 8: dec, sc next (2)
Row 9: dec (1)
FO

Sew arms to body. Position next to the neck line.


Hair:
With medium yellow, 6 sc in magic circle (6)
Row 1: 2 sc around (12)
Row 2: sc next, 2 sc next, around (18)
Row 3: *sc next 2, 2 sc next* 3 times (place marker in last sc), ch 1, turn (12)
Row 4: *sc next 3, 2 sc next* 3 times, ch 1, turn (15)
Row 5: *sc next 4, 2 sc next* 3 times, ch 1, turn (18)
Row 6: *sc next 5, 2 sc next* 3 times, ch 1, turn (21)
Row 7: *sc next 6, 2 sc next* 3 times, ch 1, turn (24)
Row 8: *sc next 7, 2 sc next, 3 times, ch 1, turn (27)
Row 9: *sc next 8, 2 sc next* 3 times, ch 1, turn (30)
Row 10: *sc next 9, 2 sc next* 3 times, ch 1, turn (33)
Row 11: *sc next 10, 2 sc next* 3 times, ch 1, turn (36)
Row 12: skip 1st sc, sc next 33, dec, ch 1, turn (34)
Row 13: skip 1st sc, sc next 31, dec, ch 1, turn (32)
Row 14-15: sc around (32)
Row 16: skip 1st sc, sc next 29, dec, ch 1, turn (30)
Row 17: skip 1st sc, sc next 27, dec, ch 1, turn (28)
FO

Row 3: join with sc at marker, sc next 3 (place marker in last sc), ch 1, turn (3)
Row 4: sc next 3, ch 1, turn (3)
Row 5: sc next 2, 2 sc next, ch 1, turn (4)
Row 6: sc next 3, 2 sc next, ch 1, turn (5)
Row 7: 2 sc next, sc next 4 (6)
FO

Row 3: join with sc at marker, sc next 2 (place marker in last sc), ch 1, turn (2)
Row 4: sc next 2, ch 1, turn (2)
Row 5: sc next, 2 sc next, ch 1, turn (3)
Row 6: sc next 2, 2 sc next (4)
FO

Row 3: join with sc at marker, sc next 2 (place marker in last sc), ch 1, turn (2)
Row 4: sc next 2, ch 1, turn (2)
Row 5: sc next, 2 sc next, ch 1, turn (3)
Row 6: sc next 2, 2 sc next (4)
FO

Row 3: join with sc at marker, sc next 3 (place marker in last sc), ch 1, turn (3)
Row 4: sc next 3, ch 1, turn (3)
Row 5: sc next 2, 2 sc next, ch 1, turn (4)
Row 6: sc next 3, 2 sc next, ch 1, turn (5)
Row 7: 2 sc next, sc next 4 (6)
FO


Hair tuffs:
With medium yellow, 4 sc in magic circle (4)
Row 1: sc next, ch 5, sl st 2nd ch from hook, sc next, hdc next 2, sc next sc in magic circle (mc),
ch 5, sl st 2nd ch from hook, sc next, hdc next 2, sc next sc in mc, ch 3, sl st 2nd ch from hook, sc next, sc next sc in mc, ch 3, sl st 2nd ch from hook, sc next
FO

Sew to top of hair. Largest tuffs are at the front. Sew hair to the head and arrange the bangs.


Lips:
With light pink, 6 sc in magic circle (6)
Row 1: 2 sc next, sl st next 2, 2 sc next, sl st next 2 (8)
FO

Sew to face. Using black yarn embroider mouth on lips.


Feet: (make 2)
With light yellow, 6 sc in magic circle (6)
Row 1: sc next, 2 sc next, around (9)
Row 2-6: sc around (9)
Row 7: sc next, dec, around (6)
Weave tail between loops and pull closed.

Flatten feet and sew on body.


Finish: Cut two circle out of white felt for eyes. Cut two smaller circles out of aqua (blue-green) felt and two smaller circles out of white felt for eye highlights. Glue pieces together and then glue to face.


Dora Pattern


Materials: bright pink, orange, blue, white and brown yarn, black and white felt, black permanent marker


Shirt front:
With bright pink, ch 21
Row 1: sc in 2nd ch from hook and remaining ch, ch 1, turn (20)
Row 2-6: sc across, ch 1, turn (20)
Row 7: sl st next 5, sc next 10, sl st next, ch 1, turn (11)
Row 8: skip 1st sc, sc next 10, ch 1, turn (10)
Row 9: sc next 4, sl st next 2, sc next 4, ch 1, turn (10)
Row 10: sc next 2, sl st next 6, sc next 2 (10)
FO


Left Back:
With bright pink, ch 11
Row 1: sc 2nd ch fromm hook and remaining ch, ch 1, turn (10)
Row 2-6: sc across, ch 1, turn (10)
Row 7: sl st next 5, sc next 5, ch 1, turn (10)
Row 8: sc next 5, sl st next, ch 1, turn (6)
Row 9: skip 1st sc, sc next 3, sl st next 2, ch 1, turn (5)
Row 10: sl st next 3, sc next 2, ch 1 , turn (5)
Row 11: sc next 2 (this forms shoulder)
FO


Right Back:
With bright pink, ch 11Row 1: sc 2nd ch fromm hook and remaining ch, ch 1, turn (10)
Row 2-6: sc across, ch 1, turn (10)
Row 7: sc next 5, sl st next, ch 1, turn (6)
Row 8: skip 1st sc, sc next 5, ch 1, turn (5)
Row 9: sl st next 2, sc next 3, ch 1, turn (5)
Row 10: sc next 2, sl st next, ch 1, turn (3)
Row 11: sc next 2 (this forms shoulder)
FO


Sew front and back together at shoulders and sides.


Sleeves:
Row 1: beginning at sc at base of sleeve (near the side seam), join with sl st, sl st next 3, sc next 8, sl st next 4 (12)
Row 2: sl st next 4, sc next 8, sl st next 4 (12)
FO


Pants:
With orange, ch 31
Row 1: sc 2nd ch from hook and in next 29, ch 1, turn (30)
Row 2-7: sc around, ch 1, turn (30)
Row 8: sc next 2 (place marker), ch 1, turn (2)
Row 9-16: sc next 2, ch 1, turn, except last row (2)
Skip 13 st from marker, join row 16 with row 7 with sl sts.


Pant legs:
Row 1: Join at row 11 with sl st, sl st next 5, sc next 10, sl st next 6 (22)
Row 2: sl at next 6, sc next 10, sl st next 6 (22)
FO


Map: (use a smaller ply yarn if you have some)
With white, ch 9
Row 1: sc 2nd ch from hook and next 7 (8)
Row 2-9: sc across, ch 1, turn, except lat row (8)
FO


Roll from row 1 to row 9. You want the middle to be as tight as possible and the edges to be a little looser. Secure the middle.


Backpack body:
With blue, ch 9
Row 1: sc 2nd ch from hook and next 7 (8)
Row 2-22: sc across, ch 1, turn (8)
Row 23: skip 1st sc, sc next 5, dec over next 2, ch 1, turn (6)
Row 24: skip ist sc, sc next 3, dec over next 2 (3)
FO


Sides: (make 2)
With blue, ch 3
Row 1, sc 2nd ch from hook and next (2)
Row 2-10: sc across, ch 1, turn, except last row (2)
FO


Sew sides to main piece. Row 1 of body should line up with row 1 of side. Sew just inside of edge.


Straps: (make 2)
With blue, ch 21
Row 1: sc 2nd ch from hook and next 20
FO

Sew to backpack.


Sleeve:
With blue, ch 4
Row 1: sc 2nd ch from hook and next 2 (3)
Row2-6: sc across, ch 1, turn, except last row (3)
FO


Sew to left of packback. Place map inside.


Hair:
With brown, 6 sc in magic circle (6)
Row 1: 2 sc around (12)
Row 2: sc next, 2 sc next, around (18)
Row 3: *sc next 2, 2 sc next* 3 times (place marker in last sc), ch 1, turn (12)
Row 4: *sc next 3, 2 sc next* 3 times, ch 1, turn (15)
Row 5: *sc next 4, 2 sc next* 3 times, ch 1, turn (18)
Row 6: *sc next 5, 2 sc next* 3 times, ch 1, turn (21)
Row 7: *sc next 6, 2 sc next* 3 times, ch 1, turn (24)
Row 8: *sc next 7, 2 sc next, 3 times, ch 1, turn (27)
Row 9: *sc next 8, 2 sc next* 3 times, ch 1, turn (30)
Row 10: *sc next 9, 2 sc next* 3 times, ch 1, turn (33)
Row 11: *sc next 10, 2 sc next* 3 times, ch 1, turn (36)
Row 12: skip 1st sc, sc next 33, dec, ch 1, turn (34)
Row 13: skip 1st sc, sc next 31, dec, ch 1, turn (32)
Row 14-15: sc around (32)
Row 16: skip 1st sc, sc next 29, dec, ch 1, turn (30)
Row 17: skip 1st sc, sc next 27, dec, ch 1, turn (28)
FO


Bangs:
Row 1: join at marker with sl st, sc next 3 (place marker), ch 1, turn (3)
Row 2: sc across, ch 1, turn (3)
Row 3: sc next, 2 sc next, sc next, ch 1, turn (4)
Row 4: sc next, 2 sc next 2, sc next (6)
FO


Row 1: join at marker with sl st, sc next 3 (place marker), ch 1, turn (3)
Row 2: sc across, ch 1, turn (3)
Row 3: sc next, 2 sc next, sc next, ch 1, turn (4)
Row 4: sc next, 2 sc next 2, sc next (6)
FO


Row 1: join at marker with sl st, sc next 3, ch 1, turn (3)
Row 2: sc across, ch 1, turn (3)
Row 3: sc next, 2 sc next, sc next, ch 1, turn (4)
Row 4: sc next, 2 sc next 2, sc next (6)
FO


Position hair on head and secure.


Finishing: Both Map and Packback have eyes, mouths and eyebrows. Use the black and white felt for the eyes. Embroider the mouths and eyebrows with black yarn. I used the marker to draw on the eyebrows for Map.


Smoochum and Pokemon © Nintendo
Dora, Map & Backpack © Nickelodeon


This is my own original pattern. Please do not sell this pattern or the products created from this pattern. Please do not modify my pattern and call it your own. If you would like to place my pattern on another site, please feel free to provide a link.